Brussels sprouts, whether you love them or hate them, have become a staple element of Christmas dinners.
They are amazing sources of Vitamin A, B, C, niacin, calcium, and iron. The only thing they’re ever remembered for though is how gassy they make you.
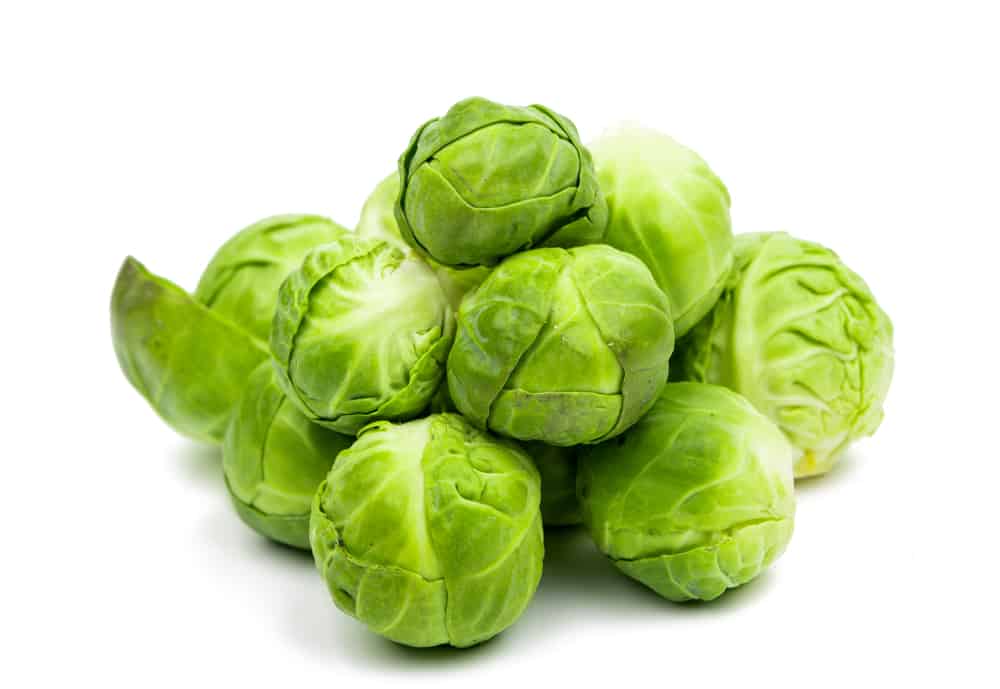
Brussels sprouts look similar to a tiny cabbage, with a slightly milder flavor. In our humble opinion, they are perfect with a drop of malt vinegar splashed on top!
From one pound of sprouts, you can get around 6 servings of the little balls of goodness.
This post may contain affiliate links. Read my disclosure policy here.
How to Choose the Best Sprouts
The best tasting sprouts will be a bright and vibrant green in color. You should try to select sprouts that appear uniform in size, as this will mean they cook more evenly.
Small, firm, and compact brussels sprouts are your best choice. If you live in North America, they will be in season from September through March.
You will get better quality sprouts if you purchase them on the stalk. This will also help them to stay fresher for longer. Another good indicator of quality is if the sprouts are fully closed. As sprouts age, they open up and become less flavorful.
Smaller sprouts are likely to have more flavor and be sweeter.
Storage
Uncooked
They should be stored in a cool, dry place inside a plastic bag. The bag should have small holes to allow the sprouts to breathe.
Place the bag inside the vegetable crisper of your refrigerator. They can be kept like this for up to 1 week.
If you have freshly harvested sprouts, these will keep a little longer. Wrap unwashed brussels sprouts in a piece of moist kitchen paper and then inside a perforated plastic bag. Store these in your vegetable crisper in the refrigerator for 3 to 5 weeks.
Sprouts that you buy on the stalk will have a longer lifespan than those purchased individually. To keep these fresh for even longer, you can place the bottom of the stalk inside a glass of water in the refrigerator. Simply snap sprouts off the stalk as and when you need them.
Uncooked and Prepped
If you wish to prepare your sprouts in advance to minimize the work you need to do on the day, this is possible. Trimmed, shredded, and cut brussels sprouts will keep well for up to 2 days.
Store them in an airtight container in the refrigerator.
Canned
A more rogue suggestion for brussels sprout storage is to pickle and can them! This does not produce the best results, but hey, some people like them!
Peel off the outer leaves and wash then chop your brussels sprouts. Boil for 3 minutes before draining.
Transfer to large, sterilized jars, leaving an inch of space at the top of the jar. Cover with boiling water, ensuring you leave 1-inch space at the top still.
Cover with the lids and run through a pressure canner set to 10 pounds of pressure (240 degrees Fahrenheit). For a pint, leave it for 30 minutes. For a quart, 35 minutes.
Remove the jars from the pressure canner and seal tightly if this is necessary.
Blanched and Frozen
You should check the sprouts to ensure there are no insects or dirt particles on the vegetables.
Peel off a couple of layers of the outer leaves from each brussels sprout. Wash the sprouts thoroughly. Alternatively, you can soak the sprouts for an hour in salted water.
You will need 1 tablespoon of salt per gallon of cold water. This will encourage any insects hiding in the sprouts to emerge.
Organize your sprouts according to size. Boil them in batches in a large pan. Small sprouts should take around 3 minutes, and larger ones up to 5 minutes.
Remove from the pan with a slotted spoon and immediately dunk into a bowl of iced water.
Place on a sheet of kitchen paper and allow to drain.
Line a baking tray with parchment paper and place the dried sprouts on top in a single layer. Place this tray into the freezer for about 1 hour, until they have frozen solid.
Remove the baking tray from the freezer and transfer the brussels sprouts to a labeled and dated freezer-safe ziplock bag. Try to leave as little room at the top of the bag as possible. Seal well and place in the freezer.
You can keep these in the freezer for up to 1 year.
Roasted and Frozen
If roasted brussels sprouts are more your vibe, read on!
You should trim and clean your sprouts as usual, while you are heating the oven to 400 degrees Fahrenheit.
Lay the sprouts in a single layer onto a baking sheet. Toss with oil and seasonings.
Roast for around 40 minutes, until tender. We recommend moving the sprouts about on the tray a few times during cooking.
When they are cooked, pour onto a wire rack and allow the brussels sprouts to cool completely.
When the sprouts are at room temperature, transfer them to a labeled and dated ziplock bag. Press as much of the air out as possible and seal. These can be stored in the freezer for up to 1 year.

How to Cook Frozen Brussels Sprouts
Uncooked Sprouts
Place the desired amount of brussels sprouts in a large saucepan and cover with seasoned water.
Bring the water to a boil and then reduce the heat. Allow the brussels sprouts to simmer for 10 to 15 minutes, until tender and perfectly cooked.
Roasted Sprouts
You have 2 options here. The first is to saute the brussels sprouts in a pan with some butter or oil until they have warmed through.
The second is to microwave them in 1-minute increments, stirring between each.
Summary
There are many different ways to store and prepare brussels sprouts. The general consensus is to choose small, firm, green sprouts that are on the stalk.
We hope you now feel confident in your brussels sprouts knowledge, ready for the holidays!